Showing posts with label Altered Items. Show all posts

Friday, November 16, 2012

Week #7 of Inspired Stamps 12 weeks of christmas tutorials: Altered Canvas


For the last 6 weeks the Inspired Stamps Blog has featured the Inspired Stamps 12 weeks of Christmas Tutorials.  Each member of the Design Team will be featured demonstrating how to create a special project.  This week #7 I am demonstrating how to create an altered canvas. 

Below are a few of the supplies I used to create my Altered Canvas.

My first step is to paint the canvas with CTMH Create-a-Shade Pearl Paint, tinted to my desired color using re-inkers.
For this canvas I mixed Holiday Red, Lilac Mist and Heavenly Blue Re-Inkers with the Create-a-Shade Paint to get my mauve-purple color.

Once I achieved my desired shade I painted my entire canvas, going over it first up and down then side to sidc to make sure the canvas was evenly covered.


Once my canvas has dried, I usually let it dry overnight. I will then start deciding what all I want to include on the canvas and start by laying out my embellies and papers trying to decide where I want to go with the look of the canvas.


Above you will see I chose a B&T piece from the La Bella Vie paper pack from CTMH, along with several rolled roses, cut using the Art Philosophy Cricut Cartridge, that I had laying around in my pre-made embellishment box.


I cut my B&T paper 5x4-1/2, then attached it to my canvas using Madge Podge.  I do coat both the back of the paper and the canvas before I lay my paper on the canvas.  Making sure that all corners of the paper are firmly sealed to the canvas.  I have taken my roller to my paper to make sure the paper is sealed.


Once my paper is sealed on I put a layer of Modge Podge over the entire Canvas, to seal it.

Once I have my B&T paper on my canvas I once again layout my embellishments to see if what I have pictured still will work, or if I need to make any changes.  I am a very visual person, and sometimes at this point I realize that what I had in mind isn't gonna work.  Checking it at this point before I start gluing down the embellishments helps prevent those "Oh, shoot" moments.  It is also at this point where I make sure my "frame" or "Focal Point" is the perfect size.
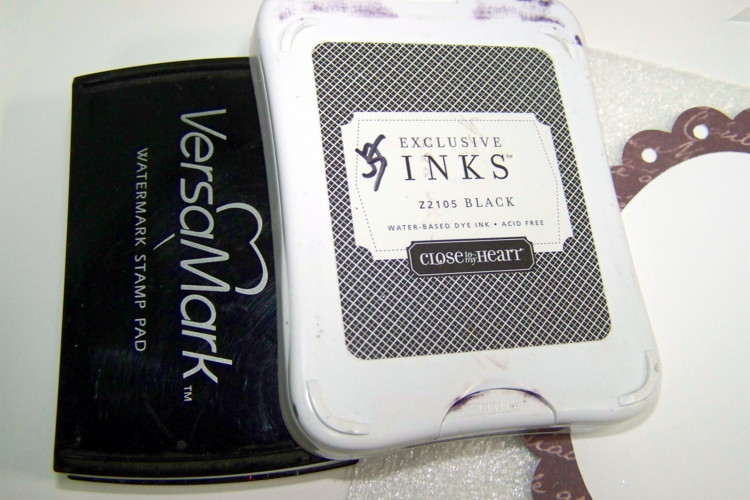
My next step I ink up my scripture in VersaMark ink and then in Black ink, before I stamp it onto my cardstock. I used Proverbs 3:5-7 from the Inspired Stamps "His Plans For You" stamp Set. I then coat it with Clear Detail Embossing Powder, and heat emboss, the image.  This prevents my water based ink from running when I coat it with Modge Podge.  Once the image as been heat embossed I adhere it to my canvas using Modge Podge 


Once I have my Scripture Focus glued on it is time to put the finishing embellishments onto my canvas.  Above I have used Modge Podge to adhere the branches and leaves to the canvas.  I adhered sparkles to the holes in my "frame".  I then let that layer dry and got ready for my final step.


The Final Step is to attach the rest of your embellishments, in my case the 3-D rolled Roses and Butterfly cut using the Art Philosophy Cricut Cartridge.  I use CTMH Liquid Glass to attach my large embellishments to my Canvas.


CTMH: Art Philosophy Cricut Cartridge, La Bella Vie Paper Pack, Black Ink, Holiday Red, Lilac Mist, Heavenly Blue Re-Inkers, Create-a-Shade Pearl Paint, White Daisy, Olive, Desert Sand, and Black Cardstock, Clear Sparkles, Clear Detail Embossing Powder, Prisma Glitter
Vellum by the Paper Co,, Modge Podge, Artist Stretched Canvas 5x7 from JoAnn's

Thursday, October 6, 2011

Inspired Stamps Designers Choice artwork

This week over that the Inspired Stamps Blog, it is a Designer's Choice Week, meaning we can create anything our hearts desire.  For my design I have created another 5x5 canvas, using the His Plan's For You Stamps Set.


I have fallen in love with creating these tiny canvas projects.  They are so easy to create and make great gifts.  This canvas was actuallyone of the many items I entered into our County Fair stamping competition.  This one was entered in the Embellished artwork catagory and it took second place.  It combines my favorite things,  One of my favorite and most used Inspired Stamps Set His Plan's For You Stamps Set, hand rolled flowers, Cricut die cuts, glitter and butterflies.


Close up of the Flowers

Close up of the butterfly.  To Create this butterfly, I used packaging tape to
gently lift off the negative image left on my cricut mat.  Once the entie image was off the mat
and stuck to my tape I sprinkled the whole thing with Prisma Glitter
and then covered the back with another piece of packaging tape.
I then taped this glitter butterfly onto a solid cardstock butterfly
and cut it out of the tape.


Materials used:  Inspired Stamps His Plans For You
CTMH Products used:  Roxie Paper pack, Black, Colonial White cardstock, CTMH Exclusive Art Philosophy Cricut Cartridge, Mocha Opaques, Prisma Glitter, Black, Desert Sand, and Smoothie Inks, Smoothie Re-inker, Create a Shade Pearl Paint, Versa Mark Ink, Clear Detail Embosing Powder, Liquid Glass
JoAnn's- 5x5 Canvas
Other - Packaging Tape

For those who were looking for an update from my vacation, it is coming, things have been just a little crazy around here with 2 boys getting sick, one starting college, and one getting ready for his first homecoming dance, not to mention football and all the other normal fall activities.  All this means mom doesn't get any time to play.

Tuesday, August 30, 2011

My Favorite Inspired Stamps

This week for our Inspired Stamps Design team post Antoinette has given us the impossible task of creating our design using our favorite Inspired Stamps set. 

Impossible you ask?? 

Well it is impossible when you you have a hard time choosing what stamps to use each week cause you love them all.  I love Inspired Stamps they are so wonderful to play with and the scriptures, along with His Little Ones, and the Sentiments are so easy to work with.

I chose to use His Plans for You  for my favorite.  Right now I am going through some rough times, (divorce, financial difficulties) through it all 2 of the verses on this set have been my go to verses in times of despair.  Proverbs 3:5-7 and Jeremiah 29:11. 

My project this week I chose to create an altered canvas showcasing Proverbs 3:5-7, this canvas will probably be hung in my kitchen where I can constantly be reminded of God's plan's for the boys and I.

Materials Used: Inspired Stamps His Plans for You 
CTMH Materials Used - Create a Shade Pearl Paint, Chocolate Re-inker, Colonial White and Black Cardstock, Magnifique and Mayberry B&T's, Clear Detail Embossing powder, Black Ink, Versa Mark Ink, Pacifica Re-Inker (to dye flower) Paper Flower, Crochet Flower, Rhinestone button, Sprakles and Bitty Sparkles. Art Philosophy CTMH Exclusive Cricut Cartridge, Black embroidery floss.
5x5 canvas from JoAnn's


Wednesday, July 20, 2011

Inspired Stamps Give away and This weeks Design Team Project

From now till Friday July 22 at 11:59 pm you will have the opportunity to win a free Inspired Stamps stampset of your choice (excluding the Colorable Alphabet set) just by leaving a comment on my blog.   I would love to have you sign up to FOLLOW my blog in the left hand margin, but that's not a requirement to win. I will choose a winner randomly from all the comments and post next Saturday who the winner is! 

Not only am I giving away a stamp set but the entire Inspired Stamps Design Team and Inspired Stamps blog are giving away Free stampsets, also.  This means that you could have 10 opportunities to win a free stamp set.  So please pop on over to my fellow team members blogs and make sure you leave a comment on their blogs also.  Links to the other Design Team Member's sights are on the upper left hand sidebar.


 We are concentrating on the scripture stamps this week. Above is my finished altered item, The stamp set I used for this project is Inspired Stamps John 14:6.  I wanted my focus to be the scripture so I kept the design relatively simple.  I plan on adding my Christmas group shot of the boys to the left side of the frame when I can get it printed.  This will eventually find it's way home on my desk at work.  

Here is a close up of the Butterflies, showing them with their wings slightly lifted off the page to give you the feeling that they are flying.


Materials Used:  Inspired Stamps "John 14:6" Stampset,
 CTMH products used Pacifica Re-Inker, Pearl Paint, Outdoor Denim Ink, Outdoor Denim and White Daisy Cardstock, Outdoor Denim Ribbon, Crotchet Flower, Blue Button, Hinges, Liquid Glass, Miracle B&T
Martha Stewart Butterfly Punch
Fiskars Sunburst Border Punch
Vellum, and Coaster from my stash.

Sunday, December 12, 2010

No Peeking Edition #3 (Mom I know you have already looked :-)


Ok this is the last gift I have done and ready for the H2H challenge.  This is a 6x6 accordian album completed using the Mistletoe Level 1 kit.  I got this Idea from several ladies on the Close  To My Heart Consultant Bulletin Boards, sorry girls I don't remember exactly who you all, but THANKS A MILLION.  This is an album from our Christmas in 2008 when we spent it in the cabin in Tennessee.  It is a gift for my mother-in-law.  Though I like it so much I think I am going to have to recreate it again for me.


The inside pages


Front & Back Cover with center pages


The Front cover.  the picture is of an old rake that they have sitting in front of
the cabin with a wreath on it.  Ken remembers having to ride on the seat when making hay.
I only have several pictures of the rake, I take a dozen or so everytime we are there.


This is the first pages.  It shows how my In-Laws had the cabin decorated when we got there.


The second set of pages.


the back cover


The center back pages.
 This project came together really quickly.  I did in all the white edges of the album in New England Ivy Ink.  I used the Mistletoe level 1 kit and cut the base pages into 6x6 squares.  Then played around with my pictures and decide on my order. Then went through and double matted all my pictures.  I also matted all the MyStickEase onto at least one sheet of cardstock for dimension and cut out.  The funnest part was Creating the Merry Christmas "M" and the Packages and Holly Embellishments.  For these I stamped the image in New England Ivy on my base  and cut out (for the Merry Christmas I didn't cut it out.)  I then stamped the image again on the Cranberry side of the snowflake B&T, I used New England Ivy for the M and Cranberry for the rest.  I then cut them out (yes I am insane when it comes to fine cutting I enjoy doing it).  Then I paper Pieced the Cranberry over top the same image on the base.  Of course for the Gifts and Holly I thought they needed a little more dimension so i mounted them on Colonial White Cardstock and Cut them out again.  Did I mention that the fine cutting for me is relaxing?  Here is a close up ofthe gift & holly.
Close up of the gifts
Close up of the Holly
Materials Used all CTMH unless otherwise noted:  Mistletoe Level 1 Paper pack and My Stickease.  St. Nick  Stamp Set, Cranberry, New England Ivy, Colonial White Card Stock, Mistletoe Level 2 Assortment, CTMH Cranberry Ribbon, Gold Ribbon I had in my stash, Foam Tape.

Hope you enjoyed viewing all the gifts I have made so far.  Now it is time to hurry back to my craft room to make more wonderful items.  Please feel free to leave a comment.  

Saturday, December 11, 2010

No Peekiing Edition #2 (Mom I know you are tempted to take a peek:-)

Okay so I said I managed to get several projects started in Tennessee over Thanksgiving.  Well thanks to Wrestling I not had much time to complete what I had started up until today when my totally full calender was totally cleared off by 10am.  I started the day out with taking Jimmy to the high school to catch the bus for his wrestling match today at 6:15 AM.  Then I came back home and tried to catch another hour's sleep before I left  to go to the match.  The day was to be full, cause I had to leave Jimmy's match at 4:00pm to go home and get ready for a card class at 6:00 pm.  Robbie, Dani & I left for the Wrestling tournament at 8:30 which would get us up to the meet by the 9:00 am start time.  Well thanks to my son thinking he knew a short cut to get there we ended up arriving about 15 minutes late.  As I pulled into the school my phone rang and it was my upline Karen calling to let me know that we were going to have to cancel our card class for the evening.  Whew, now I could spend the day watching Jimmy wrestle and not have to worry about having to leave before he was done.  So we go into the match Robbie and Dani pay to get in while I am still talking on the phone to Karen.  The kids go on in and find Jimmy, only to come immediately back out to tell me that they had a full bracket in Jimmy's weight class with no room for alternates (Jimmy had lost his wrestle off) so Jimmy wasn't wrestling today.  Now we kindly ask the lady taking money if Robbie and Dani can have a refund and we collect Jimmy and head home.  Whew my once Overloaded schedule has now become a free day for Mom.  So of course when I get home I immediately call Karen and we set up a playdate for the afternoon.  I quickly pack my bags and run off to have several hours of kids free paper therapy.  YEEHAW.

One of the projects I had started when I was in Tennessee was to cut up a Notebook Level One kit I had gotten when I first became a consultant 2 years ago.  I had taken this kit out of it's bag several times over the years but never could quite seem to be able to get pictures on it.  I have no clue what it is about Level 1's but I have a very hard time using them to complete pages.  On the Close To My Heart  Bulletin Boards lately some of the very talented consultants have been posting some awesome 6x6 mini My Creations Memory Showcase Accordian Albums and cards made from Level 1 kits, forgive me ladies I have forgotten who all you were.  These  projects inspired my next set of gifts that I have created.

Shhhhh Don't tell them but this is what my Mom and Mother In Law
are getting for  Christmas.
No you are not seeing double, I have created 2 very similar wall hanging for my Mother and MIL.  My Idea started with me cutting up my Notebook Level 1 Paper into 6 inch squares.  I them adhered them to some 6x6 chipboard I had laying around, and since I had 4 pieces of chipboard & Level 1 combo's, and 4 sons I decided to make a wall hanging using some current pictures I had taken of the boys.  Robbie's picture is one of his Sr. Pict's I had taken in October and the other 3 boys are pictures I took in TN over Thanksgiving.  This particulare pattern sheet from the level one looked really good when I alternated the sides the Black was on when laying out the wall hanging.  This project came together really easily as all I had to do was distress all the edges of the Level 1 paper with Desert Sand, then cut my Colonial White and Crystal Blue Mats, Distress the Crystal Blue mats with Crystal Blue ink, and Stamp out each boys' name using "The Works" Stamp Set & Desert Sand Ink.  Once that was done I adhered it all together, punched my holes with a crop-a-dile and then they were ready to assemble.  I couldn't decide on how to connect the 4 boards, as our boys aren't ribbon type of guys and the twill was too big for my holes.  I then thought of the leather lace Ken uses to braid hatbands.  It was perfect, plus it added to the rustic feel the distressed Black and Bamboo cardstock provided,   Of course once I got the first one together I just had to create another one using the exact same pattern, as I loved how well the boys pictures looked with this paper.  My initial plan was use 2 different Level 1's to clean them out of my stash.  Now for my problem, I only had 1 Notebook Level 1 paper pack, and it is not longer available for purchase, not to mention the fact that I was on a roll and wanted the second one done now.  So I decided to recreated the pattern using Bamboo, & Black Cardstock, and a piece of Crystal Blue B&T from the Notebook Level 2 kit.  I sanded the Bamboo & Black cardstock so some of the white was showing like the Level 1 was, I then used a slightly different B&T for the Crystal Blue strip as I no longer had the original pattern used (it was my favorite).  I measured and assembled the second one not quite as quickly but almost as quickly as the first and unless you look closely you can't tell that I didn't use the exact same paper on each.


This is a Picture of Robbie our Oldest.
this one was made using the Notebook Level 1 kit.

And this is the one in which I had to recreate the look and feel of the Level 1 kit
using Cardstock and B&T.  It is really hard to tell the difference. 
And so the rest don't feel left out here is a close up of each of their blocks, from the Level 1 kit.
Jimmy Son #2
Tony Son #3
Dillon our Baby
I still have a couple gifts to show you.  But it is getting late and I have to keep Mom in suspense a little while longer as I know she will not heed my warnings and will have read this post before Christmas. LOL  Mom just act surprised on Christmas when you open your gifts.LOL  Love ya.

No Peeking Edition #1 (Mom this means you :-)

While we were in Tennessee to visit Ken's parents and spend time in our wonderful cabin in the mountains, I started working on some projects I had in mind but was always too busy to try.

Since I had limited room to take supplies down to work on, I actually planned a little and managed to only take what I thought I would need to get those projects started.  I actually had plans to work on Christmas gifts and for the first time in forever I have actually gotten several done with 2 weeks to spare.  I am impressed, guess this old dog can learn some new tricks.

The first project I completed was a set of ornaments for our tree.   Each year I try to buy the boys each a new ornament for the tree, so when they go out on their own they will have a good collection of ornaments to take with them.  With having done this every year since they were born (and even with losing some in the fire in 2000) our tree is quite full, but there is always room on the tree for more special ornaments. This year with funds being tight We really don't have much money to spend on the boys for Christmas, so I decided that they could get handmade ornaments instead.  Now we just need to get it set up.


These are the Close To My Heart Dimensional Elements Ornaments.  This was a simple project and I was able to get all of them mostly done in about 2 hours of working while in TN.  The only thing I would have done different is I would have embossed the tops of the ornaments before I assembled them, but I didn't think about that when I was in TN and my embossing powders and heat gun where in Ohio. So I waited till I got home to emboss the tops using Silver Pearl & Gold Embossing Powders.  Doing this after they were assembled was hard cause I couldn't get the embossing powder to stick to the chipboard close to where the second layer was, which is why they all have some form of a bow on the top of the ornament.


This is Robbie's Ornament,
The picture is one of him and his Fiance' Dani, taken around Christmas time last year.
Product Used All CTMH unless otherwise stated: Mistletoe Paper, Finishing Files,
Bitty Sparkles, Mistletoe Level 2 Assortment, New England Ivy Cardstock (for Leaves)
Misc Ribbon from my stash and Liquid Glass to hold it all together 


This is One of my Ornaments,
Materials Used All CTMH unless othewise stated:
Magnifique Paper, Clear Sparkles, Pacifica Ink
Stickles, finishing files, Ribbon from my stash
and Liquid Glass to hold it all together 
I had initially covered this one in the Magnifique Feather paper, but then decided I didn't like it so I sponged it all Pacifica Blue instead. The inside of the ornament I placed the sky side of one of the papers from Magnifique and Placed the Gem in the center of the design. Well as I was playing I started adding the Stickles and really liked what I was getting so I ended up covering the center patterned paper with sparkles, If you look closely you can still see a little of the sky patterned paper. I also love how the ink bled into the Stickles on several of the ornaments.  I used the same bottle of Stickles on all the ornaments and love the different color effects I got with each one.


Tony's Ornament
Materials Used All CTMH unless otherwise stated
Mistletoe Paper, Opaques Pearls
New England Ivy Ink, Cranberry Ink, Snow Flurries Stamp Set, Finishing Files,
Ribbon & Stickles from my stash
and Liquid Glass to hold it all together 

Jimmy's Ornament
Materials Used:  Mistletoe Paper, Opaques Pearls
New England Ivy Ink, Snow Flurries Stamp Set
Stickles and Ribbon from my stash
and Liquid Glass to hold it all together 

Dillon's Ornament
Materials Used: Cranberry Ink, Mistletoe Paper
Rem Sparkle, Stickles and Ribbon from my stash
and Liquid Glass to hold it all together 

Another One for Mom
Supplies used: Mistletoe Paper
Red Sparkle, Ribbon from my stash.
and Liquid Glass to hold it all together 

Catching Up

Wow It has been almost 3 weeks since my last post.   I had promised myself that when I finally started a blog I would try to post regularly.  Well despite well laid intentions things haven't gone as planned. 

Things have been crazy around here.  The boys (Robbie, Jimmy, and Tony) have started wrestling.  Matches Started on the 4th of December, so that is taking up alot of my time.   Plus I have been trying to increase my hours at work to try to help get some bills paid and have something extra for Christmas.  Throw in a Quick Trip to our cabin in Tennessee for Thanksgiving, and everyone in the house developing colds and bronchitis and you have our normal everyday chaos.  On top of all this I have been working on some Christmas gifts for family which I will be posting on here as they get done.  (Mom  you might not want to read any more posts this month until after Christmas or it will ruin your surprise)

To start you off I am going to show you the two gifts Tony & I threw together in an hour one night before Thanksgiving.  I had walked into my craft room to find Tony stringing thin paper letters on a string to give to a classmate for a class project.  The project was you had to make 2 different handmade gifts for 2 of your fellow students.  Tony had of course put off the project to the last minute and didn't want to bother me, so he was going to create something by himself.  His idea was a string with the students name on it.  Ok I will give him an 8 in the creative department, but when you are sitting in the middle of a craft room with your Dad's handmade leather keyrings hanging on one wall and your mother's papercrafts taking up the rest of the room, you definately can do better.  So with me helping this is what we came up with in less than an hour.  Did I mention that the project was started after 9pm the night before it was due:-) 

First Project:


I found a piece of cork I had laying around from a previous project, We stamped the kids name on it in Holiday Red Ink and a Wrestling shoe and a Football in Black Ink These are the sports he participates in at school. Used Liquid Glass to glue the cork into an old frame that the glass had broken out of I had laying around, and Poof!! Project one is done.

Project Two

Ok so for Project 2 we cheated a little bit.  I had whipped this dry-erase board up in the spring for a Missions Trip fund raiser and it didn't sell.  So  we pulled it out, and took a piece of velcro and used it to attach a dry-erase pen to the board and Wow we got both projects done and Tony was in bed before 10pm.   Guess Tony can't make fun of my hobbies anymore for a long time as they got him an A+ on his project.

Monday, September 6, 2010

Missing In Action

Boy does time fly when you are in the middle of Chaos.  Since our last post lots has happened. The youngest 2 started football, Tony is playing for the TV Middle School 1-0 :-), and Dillon for the New Philly Chiefs 0-1 :-( , both boys are loving it.  We have repainted, and moved around bedrooms.  Tony and Dillon are now moved into the big bedroom in what used to be my brother's apartment, and Robbie and Jimmy now have their own rooms, since Jimmy moved into Tony & Dillon's old room (Cleaned and with a new paint job).  The boys have started school of course with Robbie and Jimmy both at Buckeye, school was spread out over 3 days.  Jimmy started first, then Robbie and Finally Tony & Dillon.  Now that September is here we are concentrating on getting ready for the county fair. 4 of the hogs have either made weight or are really close,  2 of them are iffy, of course those two just happen to be Dillon and Tony's main hogs that they really want to take (so we will see).  Now all we need to do is to get our buyer letters typed and mailed out.  I am working on getting the 4-H booth decorations ready for the club to work on, in between work and running kids to practices and games.  On top of all this me and 4 other Close to My Heart Consultants have decided to set up a booth at the fair, so in my free time I am working on getting cards and other paper items ready to sell in our booth.  What was I thinking!!!  Needless to say the house is a wreck, laundry is piled ceiling high and I don't see it getting better until after the fair is over. Until then I will slowly limp along doing a little crisis cleaning here and there.  So now that I have caught you up on our exhausting chaotic life here are some pictures of the projects we have been doing.

Tony & Dillons Room before furniture ( their school colors are red & black)

After Furniture and 2 weeks of living in it

That is Dillon being a lazy bum, and still in bed at 11:00 am  (I think he stayed up till 2 or 3 last night)

Jimmy's room ( I can't believe it is still clean)

Jimmy in his bed. I woke him up with the flash for the last picture.  He wasn't too happy with me.


Tony playing Football  ( he starts as a receiver on offense and a cornerback on defense)


Dillon's Football Pict, he is a starting guard and a tackle, though for his first game he was the center on offense cause our center didn't show up.


Now for what i have been doing in my free time

Washer pennants ( I have only made 17 so far)


Corner bookmarks


2 sided snow/fall coaster decoration


Just a few of the cards I have made to sell


Close up of the vellum butterfly


All Products used are CTMH with the following exceptions
Washers - Tractor Supply
Satin Cord - Pat Catan's
Coasters - Something I had laying around to use I can't remember where I got them

I am have used various paper packs cause I have challenges my self to use up the large pile of scraps I have laying around.