Showing posts with label Scrap Area. Show all posts

Saturday, February 25, 2012

My Scraproom Part 2 Storage & Organization

Yesterday I gave you the quick tour of my scrap/craft room, today I am going to give you a few close ups of how I have things organized to suit me.  This system has come about with lots of rearranging thing to get them to the point I can easily use everything.  to see how I have arranged things in the past you can check out my post here.  Of course going back and looking at my previous post I realize that I have gained a lot of real estate, when my ex- moved out and left his workbenches.


This Picture from yesterday shows you my main working space.  Today I will show you close ups of the area, as I have packed a lot of stuff in this tiny area.


This is where I store all my CTMH cardstock in color familys. It is on the left hand side of my desk. This rack was discarded by my ex-s work and he brought it home to me, it is perfect to hold all my cardstock.  You will notice that all my paper is in plastic bags to protect it from dust, as we live out in the country off a dirt road and I am constantly fighting a losing battle with dust.  You also see my youngest son's dog, Jazmine who is one of my scrapping buddies. 


Hanging on the wall next to my cardstock rack is this little shelf I moved from my bathroom (after adding a coat of paint to cover the rust) to my scrap room, it holds some of my favorite punches, with my paper sampler, and rulers hanging on the bottom hooks.  Right below it is a meduim size plastic cart that holds my tool caddy, and paper cutters on top.  My Adhesives and glitter in the first drawer and the rest of my punches in the bottom 2 drawers.

This is a close up of my tool caddy, I have filled the bottom of it with rice so my tools will stand up in it, so they are easier to grab when I need them.  Below is my adhesive drawer, I have used an old silverware tray, to hold my stuff and make it easier to find what I need.  The glitter and liquid glass are in CTMH Ribbon tubes hot glued into place in the tray, this let's me store them upside down so the glitter/glue is always at the top ready to use. 

This frame was one I rescued from the trash.  The idea is one I stole from Pinterest here. It was a hideously yellow brown antiqued looking frame from which I took the equally hideous picture out of and spray painted white.  I then stapled the ribbon in place and now have a perpetual picture frame, which I us for hanging pictures I am getting ready to scrap or that I am having a rough time deciding what to do with.


This next one is of my workspace (it is clean for a change, btw it doesn't look this neat right now:-).  I have a frame easel sitting in front of me to hold my idea books if I am following one of them for my layout.  My inks are in the CTMH ink carousel, the baskets hold my sponges, and blocks.  The bulletin board is for inspiration, and any notices I have to keep in front of me. 

This rack is strictly an inspirational item it holds a picture of my biggest inspirations My Boys, and a vase with handmade flowers in it.  This rack is another trash rescue, it had originally been in my bathroom, and I actually had it in the trash pile when inspiration hit and spray paint came to the rescue and it was given new life. 


This is the Wall I face, it has a dollar store wall cling that says with "God all things are possible", and lots of Butterflies.  You will also notice the "glittery Glare" that is from Prisma glitter I blew onto the wall when it was still wet, to add a touch of glitter to "MY" room. (the boys were ready to commit me when they saw me putting glitter on the walls :-)


This area is the messiest part of my table.  It is actually part of the side table shelves my ex built for me, this is the desk level shelf and I store my CTMH How To Books here along with my alphabet stamps, more blocks, some of my embellishments, retired inks, the current box of pictures I am scrapping, etc.  The wire rack is where I throw the paperpacks I am using to keep them out of my way while I work, yet they are still near by so I can easily get more paper out if needed.

On the right side of the desk I have all my CTMH B&T's, Current and Retired on this wire rack along with some of my school and special themed papers.  In organizing this rack I came to the conclusion that I am a major paper hoarder.  I have over 40 different CTMH paper packs, not counting the other misc papers I have stashed on this shelf and in the plastic drawers below.

Here is where I store all my cardstock scraps.  I have them separated by color family and it is always where I go first when I need a small piece of something.  To label these I broke out my long neglected stickers and used them to label the drawers.

This is my 4x6 photo storage, I have a box for each boy and then one for Family group pages.  There are 4 boxes here and the 5th one is beside my table, since I am always working on scrapbook pages.  I only have 19 years to catch up on.  The pictures are sorted by page or event in envelopes in the boxes with pieces of cardstock cut to size and labeled with the year. (will have to remember to do another post on my photo organization)

Along with the shoebox I also have 5, 13x13 boxes that hold all the stuff that is too big to fit into a plastic shoebox.  Things such as the boys artwork, sports pictures, certificates, etc.  These are stored in the black plastic drawers below the side table.


These are my stamp storage, the little 3 drawer plastic tower is full of Close To My Heart Stamps, and the top drawer of the large tower is full of stamps also. Plus I have a crate sitting on my table full of Alphabet stamps.  I think I have a stamp problem too!!!!! 


I have hot glued foam dividers into the plastic drawers, to make it easier to keep the stamps sets in rows.  Also any of my stamp sets that are not CTMH are put into the plastic envelopes that CTMH sells and stored in the smaller center space.


The next two drawers are full of my ribbon. Yes I know I have way to much, but it has been thinned down. My Ribbon used to fill up this entire 3 drawer strage system along with another smaller drawer and a shoe box, and I couldn't find anything. My Sister in Law gave me two big boxes of ribbon awhile back to play with, and for awhile I kept all of it thinking I would use it.  It just sat there and took up space with me using only a very little, so I went through it and kept only the ones I loved or thought I would use up. 


Now all the Ribbon is sorted by color, and displayed so I can easily see what ribbon I have and selecting the ribbon is much easier, plus I am not buying any more doubles of ribbon, thinking I was out.  I also think I shouldn't need any more Red ribbon for a very long time. LOL  These drawers are also divided by foam board hot glued into place in the drawers.


Next we move over to my work benches here is where I have my Cricut, and Cartridges.  Though since getting the CTMH Art Philosophy Cartridge I have not really used the rest much.  I had had the Cricut on my main workspace but found it was taking up too much space.  Now with it on the benches it forces me to get out of my chair and move around a little, and it actually is helping me keep from getting to stiff from sitting for long periods.  You can't see it but all my mats are hanging on a hook in the pegboard which makes it quick & easy to get them when needed.  When it was on my main work table I was constantly losing my mats under piles of stuff.


Finally we are on to my button's I love using them as embellishments, they are cute enough to use on girl pages yet they aren't too girly that I can't use them on all my boy pages.  I keep most of my embellies near me so I can use them, but I saw another  scraproom where they had all their buttons in jars, and I loved the look.  So my button's aren't only a tool they also serve as a decoration to my room.


Right above my buttons is this bulletin board that I made folowing an idea on Pinterest here.  This was an old worn out, cork bulletin board that the cork board part was starting to fall apart from use, and the frame had once been covered with contact paper to cover the ugly brown frame.  I cut out the cork, recovered it with batting and fabric, then slowly added my ribbon.  I then spray painted the frame and put it all together.  Violla another piece of trash given new life.  I use this as another staging area for pictures I just haven't figured out how I wanted to scrap.

Lastly, a tour of my scrap room would not be complete without pictures of my scrappin buddies.  Jazmine (Jazzy for short) and Sadie Sue.  These are my son's dogs but they love to come in and bug me when I am working.  Sadie even jumps up and warms my legs while I work.

Jazmine
Sadie Sue

Hope you enjoyed my little tour of my scrap room.  Now that you have all seen it, it is time for me to go in and mess it up.  PLAY TIME!!!!

Jenn


Friday, February 24, 2012

My Scrap Room

I have been doing some major cleaning/purging in my scrap/craft room lately so I decided to share how my Creative space looks with the rest of the world.

My craft room started out being the boys toy room. Since they have outgrown most of their toys, I have taken it over with my toys.  I have taken so many pictures of my room that I will be posting them in 2 posts.  Today's will be the outside walls, with quick glimpses of my storage, the next will be a closer look at some of the storage areas.

This first picture is looking into the room from the doorway.  If you notice the back wall is only half painted, I got most of it painted before wrestling season started and have not had time to finish it since because most weekends have been filled with wrestling tournaments.  Now that Wrestling season is over, and all 3 boys still at home are not planning on doing any spring sports I can hopefully get the last section painted. 


This is my main work area, I have all my inks, and papers within easy reach of my desk. 


You will notice most of my storage is an eclectic mix match of both handmade and old furniture repurposed, along with lots of plastic containers. My main work table is our old kitchen table, it is the perfect height and it gives me plenty of room to spread out. The side table/bookshelf next to the table was made by my ex-, to give me more work space and storage area.  The wire rack where I store my CTMH B&T paper was given to me by a friend cleaning out her scrap room (Thanks Karen). 


Below my side table is my stamp storage the white cart, and the black carts hold my bigger pictures that won't fit in the shoe boxes in the crates (one for each boy and one for our Disney trip), some miscellaneous (non Close To My Heart) papers I couldn't bear to part with, along with other odds and ends.  The tall Black cart is where I store my scraps, more on that in my next post.


Here is where I store my albums in the bottom wooden cupboard.  the wire shelf on top used to be behind the toilet in the bathroom, but we cut it down and I lined the shelves with cardboard covered in contact paper to cover the wire.  It now holds my Creative Memories cutting systems, my card basket, and various other items.  The shelf next to it is actually my catch all if I can't figure out where I want to store something I usually put it here.  It does have some of my idea books and lots of printed tutorials, along with my embroidery floss, and lots of precut borders.


These pictures are of my L-shaped workbench.  It is where I use my cricut, heat gun and other tools I don't have room for at my main work space.  I also have creatively stored my buttons in glass jars on top of the bench to add a little color to this side of the room.  I also work here when I get tired of sitting, and it is my nieces workspace when they come over to play.  Underneath is where I store all my CTMH catalogs, jewelry making supplies, tote bags, picture frames, sewing machine, and other miscellaneous items.  The small white square boxes in the first underneath picture hold my page protectors, completed pages that aren't in albums, 12x12 bags, etc.  The bigger white CTMH boxes hold all my Non-CTMH paper that I am either going to donate to the local 4-H girls or our community center.

So we are now back to the doorway and that completes today's tour, tomorrow I will be back with close ups of the way I organize some of my toys.

Thanks for Looking

Jenn

Thursday, August 18, 2011

The Scrapbook Room is slowly Coming Together

So far my cleaning of the scrapbook room has become a major project.  The room has been tore apart for most of the month with it looking like this for at least a week.

For several days you couldn't hardly move in the room without almost knocking over something..  Well it is slowly coming together and I have actually pulled everything from the entry way wall and the 2 small walls by my work area and the back wall, and I painted them.  Boy did that totally change the look and feel of the room.  Now with the walls by my work area painted I am slowly going through my stuff and putting all my stuff in new homes.  The room is still slightly disastrous, but at least now I can walk across the room without tripping. 

Here is a sneak peak at what freshly painted walls look like.


This is the wall I look at when working at my table.  The paint I used was a light shade of juniper and is a very comforting green.  The Saying and Butterflies are removable stickers from the dollar store, which are very easy to put on and I am totally loving.   i am actually thinking of going to get more butterflies for around the room.  That glare you see on the right hand side of the picture, is actually the light reflecting off the CTMH Prisma glitter I blew onto the wall using my heat gun (hair dryer would work also) while the paint was still wet.  I love this effect, I now have glitter on 2 of the walls by my work table and am refreshed and inspired by the warm glittery feel I get every time I set down. 

Well better get back to cleaning the rest of the room so I can post the complete scrapbook room renovations on here soon.

Thanks


Jenn


Wednesday, October 20, 2010

It's finally clean!!!!!!

Well after over a week of my scrapbook room being a total wreck (see pictures of room in post below), and me slowly putting it back into place cause of bum leg and back. it is FINALLY CLEAN!!!!!  I still need to put in the finishing touches but It is clean enough to work on and I have already worked on a couple of pages.  I now can't wait to mess it up again.  Then again maybe I should try to practice putting things away when I am done with them instead of just laying them on the first open space I find. LOL

Here is the clean version of my scrap area.
The new and improved view from the office, if you notice
all 3 table tops are relatively clean
This shelving unit holds my scrapbooks, misc idea books,
Markers, Colored Pencils, chipboard letters & other misc items

This is where I store all my scrap pieces of cardstock
I have each drawer labeled with season and colors
and then in the drawers I have bags for each season or if it is a color I use alot
like chocolate or outdoor denim they have their own bag
The green tower in this picture is a stamp set holder my
husband made 4 me using an old spice rack turntable

These drawers hold my non CTMH paper (2 black towers),
my stamp sets, and my Ribbon & Embelishments

the wooden bookshelves hold my non-Ctmh 8.5x11 paper,
the white box holds my Ctmh B&T scraps


My main workspace as you can see I have already started to mess it up again
My tool caddy, I filledthe bottom with rice so every thing stands up
MyCTMH  paper and E size stamp storage

Monday, October 18, 2010

WHAT A MESS!!!!!!

In aftermath of the chaos to get lots of cards and other items done for the fair, my scrapbook area has begun to look like a hurricane hit it.  My husband and kids think it should be condemmed.  Me on the other hand realizes that it is just a by product of my extremely creative and disorganized mind.  My area is actually in our hobby room I share with my husband, who uses his area for leather working, reloading, gun cleaning and several other hobbies he pursues.  Of course my area is strictly dedicated to my scrapbooking and papercrafting.  Though we are sharing the room, my side has gotten so bad with tools, papers, ideas and other items completely covering every available flat space, I was starting to over flow into Ken's area.  So 2 Saturday's ago I started the painful process of doing a deep cleaning of my area.  I started by moving everything out away from the walls, piling it in the hallway and on Ken's side and then mopping my half off the floor.  A girl's got to get the glitter off the concrete some how.  LOL   Well since then I have slowly been moving things back to place, I say slowly because I managed to injure my hip and lowback on Monday and have been unable to sit or stand for long periods of time since.  Ken has been pushing me to get the job finished since most of my stuff is now in his area, so he can't work on any  of his projects.  Of course he is also accusing me of taking over his side of the room, especially since everything was so bad that if I needed a flat space to work i would pull up to one of his benches LOL.  I am in the process of finishing the cleaning so I will post those pictures later, until then this is what EXTREMELY  MESSY looks like.

This is looking in the room from my office.  The first table is actually one Ken uses to cut his leather on, but as you can see I have overtaken it for now.  The white box you see is where I place my flowers or other items when i am going crazy with my homemade glimmer mist.

This is one of my work tables, it is fairly clean in this picture cause I had taken it down and used it at the fair.  Of course once I Set it back up it became a clutter magnet again.  The back wall is where my non-ctmh paper storage is at along with my stampsets and other misc items. 

These shelves are suppossed to hold my tools and supplies so I have everything at my finger tips.  The problem is I often get things out and fail to properly put them away.

This table is my main work station.  As you can see there is not an inch of real estate available to work on as i just keep throwing things on top of the piles instead of putting it away.  Did I mention that I am very messy when I am in that creative mode.

This is the resemblance of organization i have right now in my area.  This is where I keep all my CTMH cardstock and paper packs.  The cardstock is all kept in plactic bags to keep it from getting dusty and kept in Season order (my way of learning what color goes in what season).  The paper packs are just randomly put in an empty slot, so I can look through them when needed.

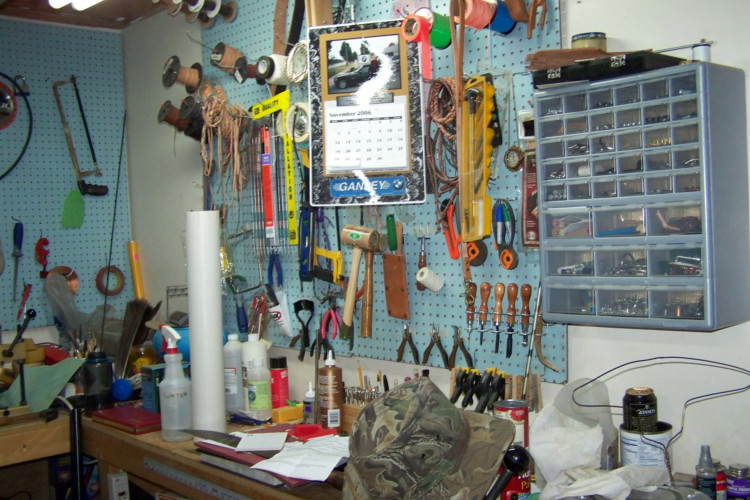
This is Ken's side of the room, if you notice he has everything in its place and actually goes nuts if anyone moves his stuff out of place.  The radio on the corner is mine as is the papers in the middle of the work space.  Though I ain't taking over this room at all.