Showing posts with label Inspired Stamps. Show all posts

Thursday, June 6, 2013

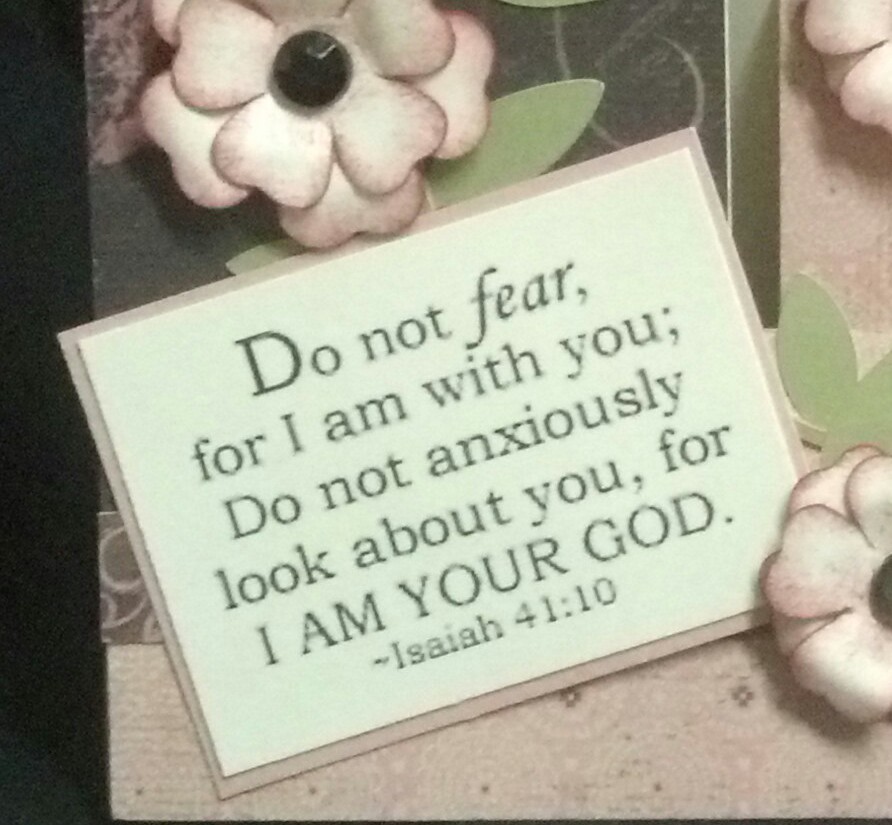
June New Release - 2x2 Scripture Isaiah 41:10

It is New Release time over at Inspired Stamps Online Store.  Today the Inspired Stamps Desigfroeam is showcasing the New Releases that will be available for purchase on the Inspired Stamps store tomorrow at Noon.

My artwork today features the new 2x2 Scripture Isaiah 41:10.  I paired this with a sentiment from the Tags stamp set to create this Double side step Thinking of You card.


Materials used: Inspired Stamps 2x2 Scripture Isaiah 41:10, Tags 
Ctmh: LaBelleVie paper pack, Colonial White, Garden Green & Desert Sand Cardstock, Black & Grey Sparkles, Bitty Clear Sparkle, Black and Vineyard Berry Ink, Prisma Glitter and Art Philosophy Cricut Cartridge.

Wednesday, May 22, 2013

HLO-Thankful Boy.

This week the Inspired Stamps DT was asked to use a His Little Ones stamp in our artwork.

I have used HLO-Thankful Boy to create this cute little tag/bookmark.  I paper pieced this little one, then paired him with the $3.99 Scripture Psalms 139:23 and the Sheet Music from the Backgrounds set. 

Thursday, May 9, 2013

New Releases at Inspired Stamps Blog


It is New Release Time over at Inspired Stamps!  Tomorrow at noon, these two 2x2 stampsand the rest of the New Releases featured byby the Inspired Stamps Design Team on today's blog will go on sale at the Inspired Stamps Online Store.
My first card features the new 2x2 Stamp Psalms 139:23.  I love these little scripture stamps, they are the perfect size for a card.
Materials Used: Inspired Stamps Psalms 139:23 & Backgrounds
CTMH  Used: Pemeberly B&T, Black, White Daisy, and Olive Cardstock, Black, & Whisper Ink, Art Philosophy Cricut Cartridge, Blue Button, Paper Flower.
My Last Card features the new 2x2 Stamp Ephesians 2:8.
Materials Used: Inspired Stamps Ephesians 2:8, Backgrounds & Flowers.
CTMH Used: La Belle Vie B&T, Colonial White, Black, Olive Cardstock, Ruby Alcohol Markers, Black & Desert Sand Ink, Art Philosophy Cricut Cartridge
Black Buttons From JoAnn's


Thursday, May 2, 2013

Flowers!!!


Materials Used: Inspired Stamps Flowers, and Label Maker Verses
CTMH: Outdoor Denim, White Daisy Cardstock.  Outdoor Denim, Pacifica, Sky and Crystal Blue Inks
Ribbon from Ofray.

Thursday, April 25, 2013

Set of Birthday Cards

This week over at the Inspired Stamps Blog the design team has been asked to create a. Set of Birthday cards.

I used several Inspired Stamps to create the above cards. .   
On my first card I used my new favorite Inspired Stamp Set  Backgrounds, Along with the flowers from the Feel Better & Tags Stamp Sets To Create my Card.

For my next card I used Backgrounds, His Plans For You, and Tags Stamp Sets create this masculine card.


On my last card I used Backgrounds, Feel Better, & Tags Stamp Sets to create my card.


Thursday, April 11, 2013

Mother's Day Card


This week over at Inspired Stamps the Design Team was asked to create a Mother's Day card. I used the new Background Stamps with Be Still Silhouettes and Label maker Alphabet to create my card.

Thursday, April 4, 2013

April New Release At Inspired Stamps

It is time for another New Release over at Inspired Stamps.  The new stamps will be on sale in the online store Friday at noon.  This week the Design Team is Showcasing the New Releases. 

I am giving you a Sneak Peek of the new Background Stamps.  I absolutely love this set!! It has 4 different background textures, sheet music, bubble wrap, chicken wire, and netting.  For my projects I used the bubble wrap & sheet music.  I was planning on creating something with all 4 backgrounds but the easter holiday and a sick son interfered.  So keep an eye on my creations cause I will be using these backgrounds a lot.


For my first project I decided to show how the Background Stamps can be used on a scrapbook layout. If you see my scrapbooks you will see that I love to create my own B&T paper using stamps.  The New Background Stamps are perfect for this.  The above layout is for my son Tony's scrapbook, he turns 17 today.  He is my athlete and loves to wrestle.  For this layout I used the bubble wrap background stamp and inked it partially with Cranberry ink, the inked the other end with black ink (our school colors).  I then stamped it 4 times across my page to create my red & black corners. I love how Easily this layout came together, with the help of the background stamps.


For the above card I used the sheet music background.  As a child my mom have old sheet music stored in the piano bench and my sister and I would pull it out and sit at the piano and pretend to play.  It was brown with age, so with that in mind I decided to go for the same feel.  I stamped the background in Cocoa ink, then distressed it all over with Desert Sand ink, this really gave it the old sheet music feel. I finished my card with the 1Thes. 5:18 scriptyre from the new Labelmaker Verse set.
I hope you enjoyed your little sneak peek of the New Background Stamps from Inspired Stamps.  I am positive you will be seeing these backgrounds in my artwork quite often.


Materials used:  
Wrestling page: Inspired Stamps Background Stamp
CTMH: Cranberry and Black ink, Cranberry and White Daisy cardstock 
School paper was from a local scrapbook store.

Thank You Card: Inspired Stamps Background Stamps
CTMH: Cocoa & Desert Sand ink, Colonial White & Cocoa cardstock, Typeset B&T, Paper Floeers, Shimmer Brads and Chocolate Brad.

Thursday, March 28, 2013

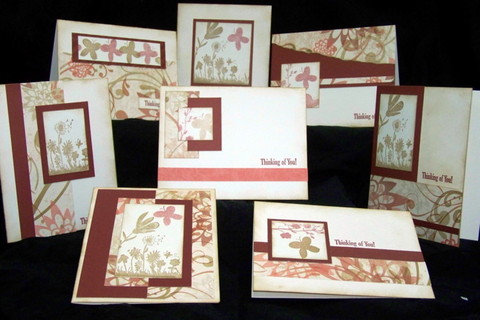
Thinking of you card set

 
Today the Design Team over at Inspired Stamps are showcasing Thinking of you card sets.For My cards I used the Tags  And Be still Silouttes To create the set of 8 cards.


Thursday, March 21, 2013

Favorite Stamp to Color


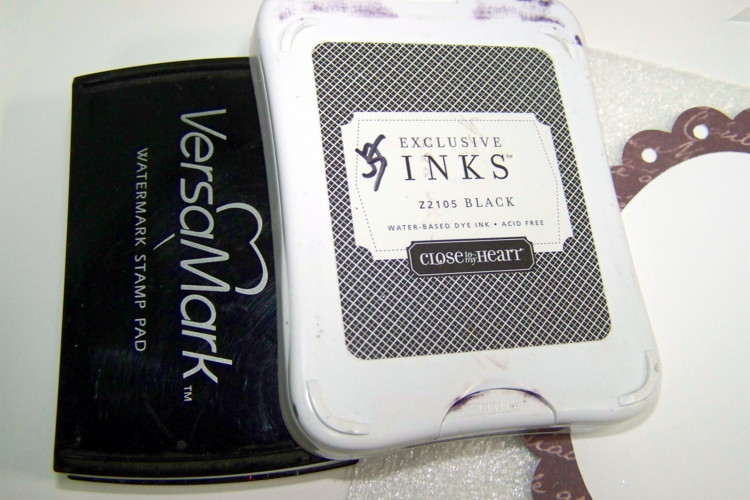
This week for the Inspired Stamps Design Team we have been asked to show our favorite stamp to color.  Mine would definately have to be the His Little Ones stamps.  Coloring for me is something I don't do that often.  I actually stay away from it because I feel I am not that Good at it. I actually prefer paper piecing to coloring.  So when I saw this weeks assignment I groaned just a little.  For my card I stamped the HLO:Thankful Boy in Versa Mark and Black ink, then heat embossed it.  I did this to prevent my black from bleeding into my coloring when I used the waterbrush to blend my watercolor pencils.  To finish my card I used a scripture from the "His Plans for You" Stamp Set.


Friday, March 8, 2013

New Releases At Inspired Stamps

 
Today at Noon Inspired Stamps will have their New Releases in their online store. 
So Members of the Design Team have been asked to Feature some of the New Releases in their artwork.  All new release artwork can be found on the Inspired Stamps Blog
Today my Artwork features the "Names of Jesus" background stamp set.  I have used it as the background of my many projects today.  I had a lot of fun with this stamp set, for most of my cards I stamped on vellum, then heat embossed the whole sheet with either clear detail powder from CTMH, or Sparkle Powder by ala mode from JoAnn's.  I then adhered the vellum on cardstock and proceeded to tear around the edges until I acheived a size that would fit on my card base.  All cards are 5-1/2x4-1/4.  If you will notice the background of all my cards is pretty much the same, but I have acheived different looks with how I placed the sentiment and embellished the card.


For this card I used the Names of Jesus for the background on white cardstock, then I random stamped the big flower from the Flower set over it in Sunny Yellow, Holiday Red, and Star Spangled Blue. This is the only card that doesn't have the background stamped on vellum.
Materials Used: Inspired Stamps Names of Jesus, Flowers, Inspired Stampers Favorite Collection #2
CTMH: White Daisy and Holiday Red Cardstock, Slate, Sunny Yellow, Holiday Red, Star Spangled Blue and Black Ink. Black Sparkles
Black Background paper was from my scraps and I know I got it at JoAnn's
 

The rest of the cards were stamped on vellum then heat embossed, twice. I had a hard time getting good clear pictures because the embossing reflected the light. 
This card I after I torn around the edges I sponged the rough edges with Slate Ink. This one also uses a verse from the Inspired Stampers Favorite Colletion #2.  
 
Materials Used: Inspired Stamps Names of Jesus,  Inspired Stampers Favorite Colletion #2. 
CTMH: For Always B&T, Black and White Cardstock, Black & Slate Ink, Clear Detail embossing Powder, Black Sparkles
Vellum by The Paper Co


Close up of the embossed vellum with out a glare.


Thursday, February 28, 2013

Easter Sets


This week for our Inspired Stamps Design Team work we were asked to create a set of Easter cards.  To me Easter is pastel colors and flowers with the promise of Spring.  I now had my colors but next I needed the design.  I have been in a creative rut lately, so off to Pinterest I went to find my inspiration.  This helped and I created the above card set.  I used the big flower from the Flowers stamp set amd the Label Maker Alphabet Stamp set. 

I first cut my squares and placed glued them to a 3x3 square, then I stamped my flowers in Versa Mark ink and Heat embossed them with White embossing powder.  You can't tell from the picture but they are placed on a piece of white cardstock that is embossed using my cuttlebug.

Materials Used:  Inspired Stamps Flowers and Label Maker Alphabet
CTMH:  White Daisy, Baby Pink, Heavenly Blue, Kiwi, Sunkiss Cardstock, Black Ink
Other: Versa Mark Ink, White embossing powder.

Thursday, February 21, 2013

Black & White Card

 
This week over at Inspired Stamps we were asked to create a Scripture focused card.  I created this simple Black and White Thank You Card using the $3.99 Single Scripture Stamp Ephesians 5:20.
 
CTMH: For Always B&T, Black Ink, Bitty Sparkles, White Daisy Cardstock
Flower from my stash

Tuesday, January 15, 2013

Love Sets


This week the Design Team over at Inspired Stamps are showing off Card Sets with a Love Theme.  I used a couple of stamp sets to create my set of Cards.  Be Still Silhouettes, More Perfect Sentiments, and the $3.99 Scripture Romans 8:28


Materials Used:  Inspired Stamps Be Still Silhouettes, More Perfect Sentiments, and $3.99 Scripture Romans 8:28.
CTMH:  Dotty for You Paper, White Daisy, Sunset, Hollyhock, Lagoon, Grey Wool Cardstock.  Sunset, Hollyhock, Slate and Black inks 


PS - Sorry I didn't have a post last week, I got the flu over the Holidays, which developed into Bronchitis, and I am just now getting to the point where I don't fall exhausted into bed in the evenings after work.  And since Mom (Me) was the only one who got sick, and seems to be the only one who can clean the house, I am facing lots of catch up housework, which is leaving this girl very little time to play.  How can no one cook and every single dish in the house get dirty?


Tuesday, December 11, 2012

Blue and Silver Christmas


We are another week closer to Christmas, and this week, the Inspired Stamps Design Team is using our christmas stamps in our creations.  I have used Vintage Christmas, and Blessed Little Christmas stamp sets to create this simple Navy, White and Silver christmas Card.

Materials Used:  Inspired Stamps Vintage Christmas, and Blessed Little Christmas
CTMH: Outdoor Denim and White Daisy Cardstock
Ranger Silver Embossing powder
Pizazz Silver Cardstock
Versa Mark Ink 

Tuesday, December 4, 2012

Christmas Thank You


This week over at Inspired Stamps the Design Team was asked to create a project using Christmas Stamps, okay so my artwork isn't really Christmas it is  frosty, and you know you can always use a winter time Thank You Note for your Christmas Gifts.  I used "Let it Snow" and "Label Maker Aphabet" to create my "Thank you snow much" card. 

Materials Used: Inspired Stamps Sets "Let It Snow" and "Label Maker Alphabet"
CTMH Used: Sarsaparilla Paper pack, Outdoor Denim, Pacifica, Crystal Blue and White Daisy Cardstock, Outdoor Denim and Sunset Marker Sets, Black Ink, Prisma Glitter, Licorice opaques

Tuesday, November 27, 2012

Quick and Easy Cards

What do you get when you have Cuttlebug embossing folders, a cricut, and Inspired Stamps?  Quick and Easy cards.  This week over at the Inspired Stamps Blog we are showcasing Quick and Easy cards.  The ones I have made below, only took me about 2 hours to make all 14, and that was with my niece here talking with me while I worked.  If you notice, I changed up the look of these cards by using different accent colors, and on the bottom one I changed up the position of the banner, to give the card a little different look.


For this card I used Vintage Christmas stamp set, a musical score embossing folder, and the Art Philosophy Cricut cartridge to create this very basic, yet elegant Christmas Card.

For this card I used the "Merry Christmas" from Blessed Little Christmas and a snowflake from Let It Snow Stamp Sets, a snowflake embossing folder and the Art Philosophy Cricut Cartridge to create this card. 

Materials Used: Inspired Stamps  Vintage Christmas, Blessed Little Christmas, Let It Snow
CTMH: White Daisy, Ponderosa Pine, Pacifica, and Cranberry Cardstock, Believe and Dakota B&T, red and clear sparkles, Art Philosophy Cricut Cartridge
Cuttlebug embossing folders:  snowflakes and Musical score.


Friday, November 16, 2012

Week #7 of Inspired Stamps 12 weeks of christmas tutorials: Altered Canvas


For the last 6 weeks the Inspired Stamps Blog has featured the Inspired Stamps 12 weeks of Christmas Tutorials.  Each member of the Design Team will be featured demonstrating how to create a special project.  This week #7 I am demonstrating how to create an altered canvas. 

Below are a few of the supplies I used to create my Altered Canvas.

My first step is to paint the canvas with CTMH Create-a-Shade Pearl Paint, tinted to my desired color using re-inkers.
For this canvas I mixed Holiday Red, Lilac Mist and Heavenly Blue Re-Inkers with the Create-a-Shade Paint to get my mauve-purple color.

Once I achieved my desired shade I painted my entire canvas, going over it first up and down then side to sidc to make sure the canvas was evenly covered.


Once my canvas has dried, I usually let it dry overnight. I will then start deciding what all I want to include on the canvas and start by laying out my embellies and papers trying to decide where I want to go with the look of the canvas.


Above you will see I chose a B&T piece from the La Bella Vie paper pack from CTMH, along with several rolled roses, cut using the Art Philosophy Cricut Cartridge, that I had laying around in my pre-made embellishment box.


I cut my B&T paper 5x4-1/2, then attached it to my canvas using Madge Podge.  I do coat both the back of the paper and the canvas before I lay my paper on the canvas.  Making sure that all corners of the paper are firmly sealed to the canvas.  I have taken my roller to my paper to make sure the paper is sealed.


Once my paper is sealed on I put a layer of Modge Podge over the entire Canvas, to seal it.

Once I have my B&T paper on my canvas I once again layout my embellishments to see if what I have pictured still will work, or if I need to make any changes.  I am a very visual person, and sometimes at this point I realize that what I had in mind isn't gonna work.  Checking it at this point before I start gluing down the embellishments helps prevent those "Oh, shoot" moments.  It is also at this point where I make sure my "frame" or "Focal Point" is the perfect size.

My next step I ink up my scripture in VersaMark ink and then in Black ink, before I stamp it onto my cardstock. I used Proverbs 3:5-7 from the Inspired Stamps "His Plans For You" stamp Set. I then coat it with Clear Detail Embossing Powder, and heat emboss, the image.  This prevents my water based ink from running when I coat it with Modge Podge.  Once the image as been heat embossed I adhere it to my canvas using Modge Podge 


Once I have my Scripture Focus glued on it is time to put the finishing embellishments onto my canvas.  Above I have used Modge Podge to adhere the branches and leaves to the canvas.  I adhered sparkles to the holes in my "frame".  I then let that layer dry and got ready for my final step.


The Final Step is to attach the rest of your embellishments, in my case the 3-D rolled Roses and Butterfly cut using the Art Philosophy Cricut Cartridge.  I use CTMH Liquid Glass to attach my large embellishments to my Canvas.


CTMH: Art Philosophy Cricut Cartridge, La Bella Vie Paper Pack, Black Ink, Holiday Red, Lilac Mist, Heavenly Blue Re-Inkers, Create-a-Shade Pearl Paint, White Daisy, Olive, Desert Sand, and Black Cardstock, Clear Sparkles, Clear Detail Embossing Powder, Prisma Glitter
Vellum by the Paper Co,, Modge Podge, Artist Stretched Canvas 5x7 from JoAnn's