Saturday, December 11, 2010

No Peeking Edition #1 (Mom this means you :-)

While we were in Tennessee to visit Ken's parents and spend time in our wonderful cabin in the mountains, I started working on some projects I had in mind but was always too busy to try.

Since I had limited room to take supplies down to work on, I actually planned a little and managed to only take what I thought I would need to get those projects started.  I actually had plans to work on Christmas gifts and for the first time in forever I have actually gotten several done with 2 weeks to spare.  I am impressed, guess this old dog can learn some new tricks.

The first project I completed was a set of ornaments for our tree.   Each year I try to buy the boys each a new ornament for the tree, so when they go out on their own they will have a good collection of ornaments to take with them.  With having done this every year since they were born (and even with losing some in the fire in 2000) our tree is quite full, but there is always room on the tree for more special ornaments. This year with funds being tight We really don't have much money to spend on the boys for Christmas, so I decided that they could get handmade ornaments instead.  Now we just need to get it set up.


These are the Close To My Heart Dimensional Elements Ornaments.  This was a simple project and I was able to get all of them mostly done in about 2 hours of working while in TN.  The only thing I would have done different is I would have embossed the tops of the ornaments before I assembled them, but I didn't think about that when I was in TN and my embossing powders and heat gun where in Ohio. So I waited till I got home to emboss the tops using Silver Pearl & Gold Embossing Powders.  Doing this after they were assembled was hard cause I couldn't get the embossing powder to stick to the chipboard close to where the second layer was, which is why they all have some form of a bow on the top of the ornament.


This is Robbie's Ornament,
The picture is one of him and his Fiance' Dani, taken around Christmas time last year.
Product Used All CTMH unless otherwise stated: Mistletoe Paper, Finishing Files,
Bitty Sparkles, Mistletoe Level 2 Assortment, New England Ivy Cardstock (for Leaves)
Misc Ribbon from my stash and Liquid Glass to hold it all together 


This is One of my Ornaments,
Materials Used All CTMH unless othewise stated:
Magnifique Paper, Clear Sparkles, Pacifica Ink
Stickles, finishing files, Ribbon from my stash
and Liquid Glass to hold it all together 
I had initially covered this one in the Magnifique Feather paper, but then decided I didn't like it so I sponged it all Pacifica Blue instead. The inside of the ornament I placed the sky side of one of the papers from Magnifique and Placed the Gem in the center of the design. Well as I was playing I started adding the Stickles and really liked what I was getting so I ended up covering the center patterned paper with sparkles, If you look closely you can still see a little of the sky patterned paper. I also love how the ink bled into the Stickles on several of the ornaments.  I used the same bottle of Stickles on all the ornaments and love the different color effects I got with each one.


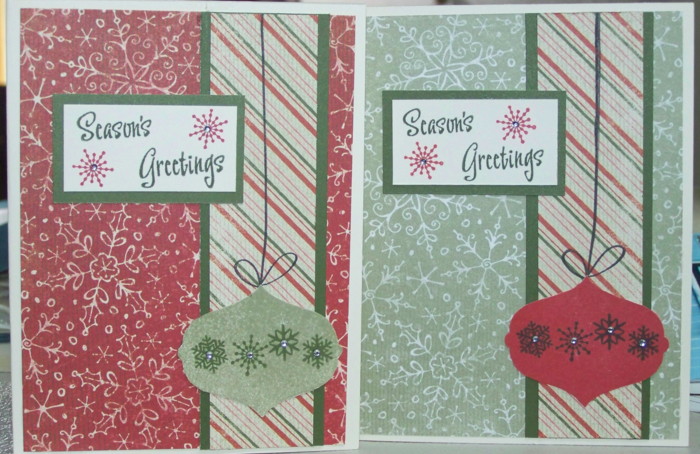
Tony's Ornament
Materials Used All CTMH unless otherwise stated
Mistletoe Paper, Opaques Pearls
New England Ivy Ink, Cranberry Ink, Snow Flurries Stamp Set, Finishing Files,
Ribbon & Stickles from my stash
and Liquid Glass to hold it all together 

Jimmy's Ornament
Materials Used:  Mistletoe Paper, Opaques Pearls
New England Ivy Ink, Snow Flurries Stamp Set
Stickles and Ribbon from my stash
and Liquid Glass to hold it all together 

Dillon's Ornament
Materials Used: Cranberry Ink, Mistletoe Paper
Rem Sparkle, Stickles and Ribbon from my stash
and Liquid Glass to hold it all together 

Another One for Mom
Supplies used: Mistletoe Paper
Red Sparkle, Ribbon from my stash.
and Liquid Glass to hold it all together 

Catching Up

Wow It has been almost 3 weeks since my last post.   I had promised myself that when I finally started a blog I would try to post regularly.  Well despite well laid intentions things haven't gone as planned. 

Things have been crazy around here.  The boys (Robbie, Jimmy, and Tony) have started wrestling.  Matches Started on the 4th of December, so that is taking up alot of my time.   Plus I have been trying to increase my hours at work to try to help get some bills paid and have something extra for Christmas.  Throw in a Quick Trip to our cabin in Tennessee for Thanksgiving, and everyone in the house developing colds and bronchitis and you have our normal everyday chaos.  On top of all this I have been working on some Christmas gifts for family which I will be posting on here as they get done.  (Mom  you might not want to read any more posts this month until after Christmas or it will ruin your surprise)

To start you off I am going to show you the two gifts Tony & I threw together in an hour one night before Thanksgiving.  I had walked into my craft room to find Tony stringing thin paper letters on a string to give to a classmate for a class project.  The project was you had to make 2 different handmade gifts for 2 of your fellow students.  Tony had of course put off the project to the last minute and didn't want to bother me, so he was going to create something by himself.  His idea was a string with the students name on it.  Ok I will give him an 8 in the creative department, but when you are sitting in the middle of a craft room with your Dad's handmade leather keyrings hanging on one wall and your mother's papercrafts taking up the rest of the room, you definately can do better.  So with me helping this is what we came up with in less than an hour.  Did I mention that the project was started after 9pm the night before it was due:-) 

First Project:


I found a piece of cork I had laying around from a previous project, We stamped the kids name on it in Holiday Red Ink and a Wrestling shoe and a Football in Black Ink These are the sports he participates in at school. Used Liquid Glass to glue the cork into an old frame that the glass had broken out of I had laying around, and Poof!! Project one is done.

Project Two

Ok so for Project 2 we cheated a little bit.  I had whipped this dry-erase board up in the spring for a Missions Trip fund raiser and it didn't sell.  So  we pulled it out, and took a piece of velcro and used it to attach a dry-erase pen to the board and Wow we got both projects done and Tony was in bed before 10pm.   Guess Tony can't make fun of my hobbies anymore for a long time as they got him an A+ on his project.

Wednesday, November 17, 2010

Recent Layouts

Our last all day crop was held at the Dover alliance church last Saturday.  I had a wonderful day despite being up till 2 am the night before due to car trouble and having to pack.  Since I was helping out with the crop I only managed to get 3 more pages done for Robbie's scrapbook.  I need to hurry up and get it done as his May Graduation is approaching faster than I would care to admit.

In order to quickly get some layouts done I decided to work on getting his sports photo's scrapped. (quick easy layouts little to no journalling)  Here is what I managed to get done.


8th grade Wrestling
 My favorite of the day. I have a hard time finding Wrestling paper so I took the In The Game - Wrestling Stampset from CTMH and random stamped the Images onto Cranberry Cardstock using tone on tone Cranberry ink for images & Star & Black for words.  The titles are cut from the composite picture and used as my title.  Materials Used: Cranberry, Black and White Daisy CS, Cranberry & Black inks, Tiny Typewritter Alpha , The Works Alpha, In the Game - Wrestling Stamp Sets.  Wrestling B&T & Stickers were from my Non-CTMH Stash. Stipple Brush to give white mats a speckled look.


7th Grade Football
Materials Used - White Daisy Cardstock, Red CS from The Paper co, Football B&T from my non-CTMH stash.  School ribbon from LSS, Stamp Set Used Touchdown.  Inks Holiday Red & Black  This was based on a Layout from the Reflections Scrapbook Program.


Freshman Baseball
  This Layout I did as I played along with our Progressive Page Challenge, I couldn't participate in the contest but I wanted to prove that it wasn't hard to do.  Steps were 1) choose cardstock, 2) choose B&T, 3)Mat Pictures (but don't attach) 4)  Add Stamped image to your Cardstock or B&T 5) add Title, 6) Add Punched item  7) Distress Something on Page   8) Attach Pictures  9) Add Journalling (who, what, where, why, when)   10)  Add finishing touches and complete
Freshman Baseball Left side


Freshman Baseball Right side LO
Materials used Black & White Daisy CTMH Card Stock, Red Cardstock from The Paper Co, Trojan B&T from LSS, All-Star Stamp Set, Holiday Red & Black Inks, White & Black Grosgrain Ribbon

I will say I was a little tired of Black & Red by the end of the day. LOL

Warren Township Card Class Rescheduled

The card Class at the Warren Township community Center originally scheduled for November 9 has been rescheduled for November 30 from 6-8pm.  Cost is only $5.00 for the 4 cards pictured below.  For more information contact Jenn @ smiths0805@tusco.net  Come enjoy a evening of cardmaking fun.

Wednesday, November 10, 2010

HAPPY 18th BIRTHDAY ROBBIE


Hard to believe that 18 years ago today I held a tiny little 20.5 in,  8lb 9 oz boy in my arms at Riverside Hospital, in Columbus OH. Now he is a 215lb 5'11" tall young man in his Senior year of High school.  Amazing how time flies.  He may be considered an adult by others but to me he will always be my Baby Boy.  Now to get his album done before he graduates, or gets married.  He gave his girlfriend Dani an engagement  ring on Oct 30, 2010 their 1 year aniversary of dating.  He couldn't have picked a better girl, Welcome to the family Dani.  Will post pictures of both of them later.

This is one of my favorite Pictures I recently took of Robbie.
It will be one of his Senior Pictures.

Saturday, October 30, 2010

Card Class At Warren Township community Center

I am hosting a Card Class at the Warren Township Community Center, on November 9 at 6:00pm.  So I have been playing around with my stamps trying to come up with some simple yet great looking cards for everyone to make.  I had already decided on what paper packs I was going to use Mistletoe & Magnifique. 

I quickly came up with the Mistletoe cards posted here.  I had a gathering last week and needed something to WOW veteran wood Stampers so of course I was going to use an image that had a base & shade stamp, so that they could CLEARLY see the difference between our clear acrylic and the traditional wood stamps. They will have their choice of either making one of each design or 2 of one.


Materials Used All CTMH: Mistletoe Bulk
Colonial White, New England Ivy White Daisy Cardstock
Holiday Trinkets Stamp set
Bitty Sparkles
Inks: Cranberry, New England Ivy, Garden Green, Black


The Magnifique card was the one that had me stumped.  Try as I might I couldn't come up with anything, then Christine Adams a fellow consultant posted her cards for her workshop and her cards got my creative juices flowing.   You can see her cards here http://creatingwithchristine.blogspot.com/2010/10/christmas-card-workshops.html.  So I got out my Magnifique Papers and started playing, here is what I came up with.  THANKS CHRISTINE for the inspiration.


'This is all of the cards I came up with
the hard part was deciding which one I wanted to use for the class.
All 4 used Magnifique Paper, Pacifica, Sky, White Daisy and Outdoor Denim Cardstock
Sky, & Pacifica Ink
Irrededscent ribbon by Darcie


Stamp Set Holiday Trinkets, Navy Ribbon from Jo-Anns & Licories Opaques
Our corner rounder to make the scallops
I love this one but since I had already used the Holiday Trinkets stamp set
 on the Mistletoe card I decided not to use this one.


This one uses A Timber, Bitty Sparkles and our corner rounder to make the scallops,
I like this one but didn't love it as much as the ornament.


This one uses A Timber, Bitty Sparkles and our corner rounder to make the scallops,
I like this one too but still didn't love it as much as the ornament.


WE HAVE OUR WINNER!!!

This one uses A Timber, Bitty Sparkles
I used a fiskars border puch to create the lace look of the White daisy & Outdoor Denim
then instead of the gifts I used the border in both sky & pacifica


So here are the 4 cards you can make if you come to the Warren Township Community Center on November 9 at 6 pm.  You only pay $5.00 to make 4 cards, 2 each of the 2 designs.  Plus I am offering each additional card made for $1.00.


You can make these 4 cards for $5.00.
 

Wednesday, October 20, 2010

It's finally clean!!!!!!

Well after over a week of my scrapbook room being a total wreck (see pictures of room in post below), and me slowly putting it back into place cause of bum leg and back. it is FINALLY CLEAN!!!!!  I still need to put in the finishing touches but It is clean enough to work on and I have already worked on a couple of pages.  I now can't wait to mess it up again.  Then again maybe I should try to practice putting things away when I am done with them instead of just laying them on the first open space I find. LOL

Here is the clean version of my scrap area.
The new and improved view from the office, if you notice
all 3 table tops are relatively clean
This shelving unit holds my scrapbooks, misc idea books,
Markers, Colored Pencils, chipboard letters & other misc items

This is where I store all my scrap pieces of cardstock
I have each drawer labeled with season and colors
and then in the drawers I have bags for each season or if it is a color I use alot
like chocolate or outdoor denim they have their own bag
The green tower in this picture is a stamp set holder my
husband made 4 me using an old spice rack turntable

These drawers hold my non CTMH paper (2 black towers),
my stamp sets, and my Ribbon & Embelishments

the wooden bookshelves hold my non-Ctmh 8.5x11 paper,
the white box holds my Ctmh B&T scraps


My main workspace as you can see I have already started to mess it up again
My tool caddy, I filledthe bottom with rice so every thing stands up
MyCTMH  paper and E size stamp storage